Making Your First Release from Repo#
This guide covers creating your first release on a repository that already uses Jupyter Releaser using workflows on its own repository.
Prerequisites#
Admin write access to the target repository
Completed the Checklist for Adoption
Prep Release#
Go to the “Actions” tab in the repository.
Select the “Step 1: Prep Release” workflow on the left
Click on the “Run workflow” dropdown button on the right
Fill in the appropriate parameters
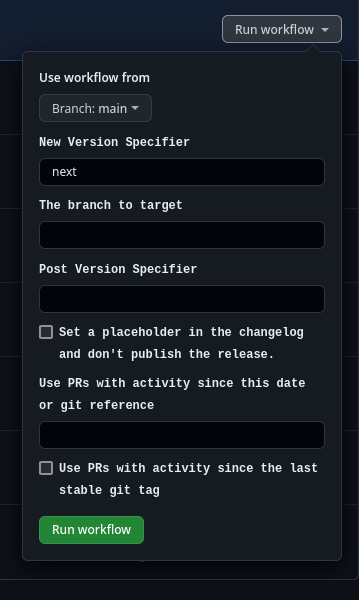
The “New Version Spec” will usually be the full version (e.g. 0.7.1). Repos using
hatchcan also use segments such as patch, minor, alpha,… .Use the “since” field to select PRs prior to the latest tag to include in the release
Check “Use PRs with activity since the last stable git tag” if you would like to include PRs since the last non-prerelease version tagged on the target repository and branch.
The additional “Post Version Spec” field should be used if your repo uses a dev version (e.g. 0.7.0.dev0)
Check “Set a placeholder in the changelog and don’t publish the release” if you want to carry a silent release (e.g. in case of a security release). That option will change the default behavior by keeping the version changelog only in the GitHub release and keeping it private (aka in Draft state). The changelog file will only contains a placeholder to be replaced by the release body once the maintainers have chosen to publish the release.
The workflow will use the GitHub API to find the relevant pull requests and make an appropriate changelog entry.
The workflow will create a draft GitHub release to the target repository and branch, with the draft changelog contents.
Review Changelog#
Go to the draft GitHub Release created by the “Prep Release” workflow
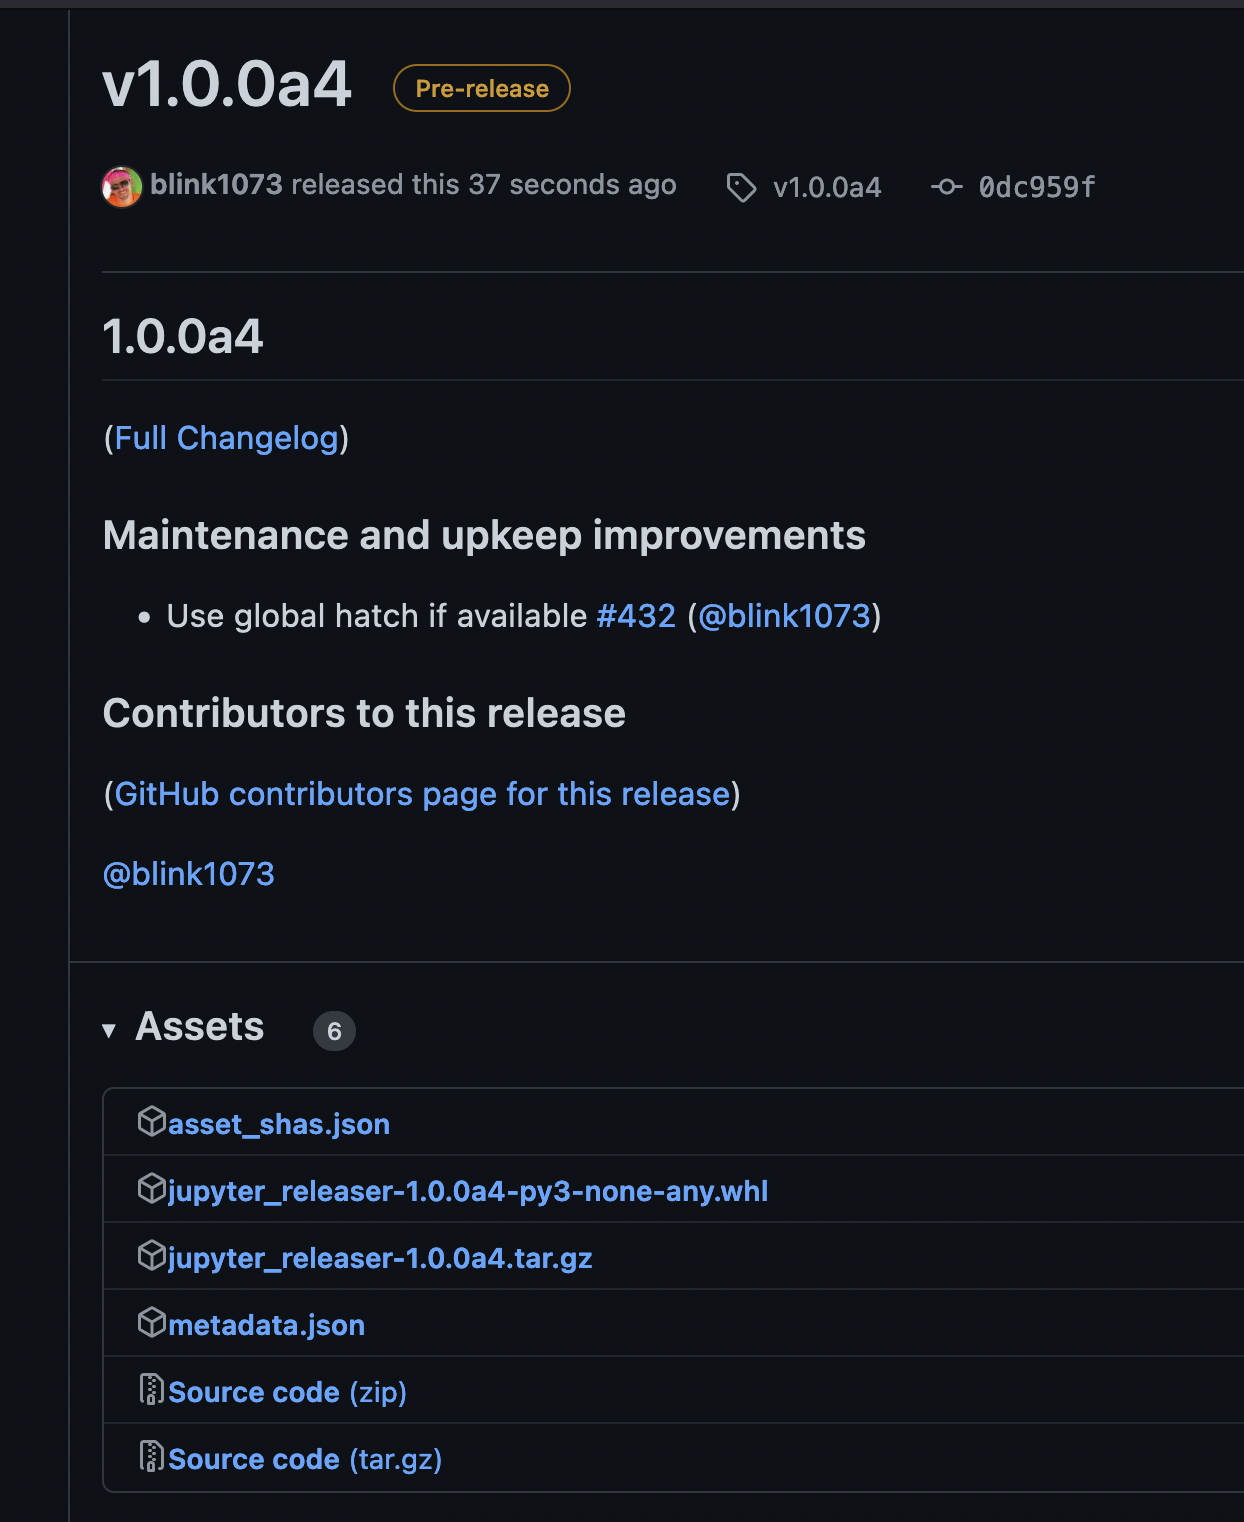
Review the contents, fixing typos or otherwise editing as necessary.
If there is a section called “Other Merged PRs”, it means those PRs did not have one of the appropriate labels. If desired, you can go label those PRs and then re-run the workflow, or move the entries manually to the desired section. The appropriate labels are: bug, maintenance, enhancement, feature, and documentation.
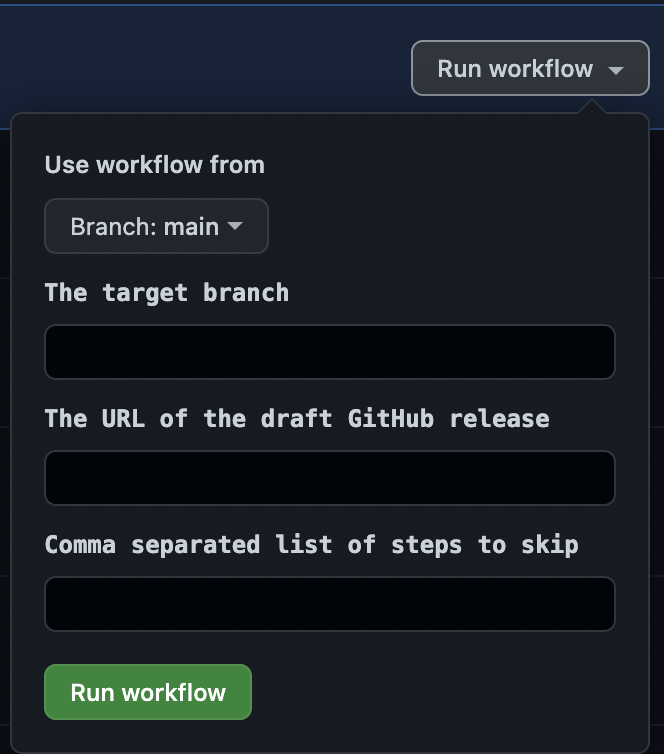
Publish Release#
Return to “Actions” tab for the repository
Select the “Publish Release” workflow on the left
Click on the “Run workflow” button on the right
(Optional) Fill in draft GitHub Release URL given by the Changelog PR. If you leave it blank it will use the most recent draft GitHub release.
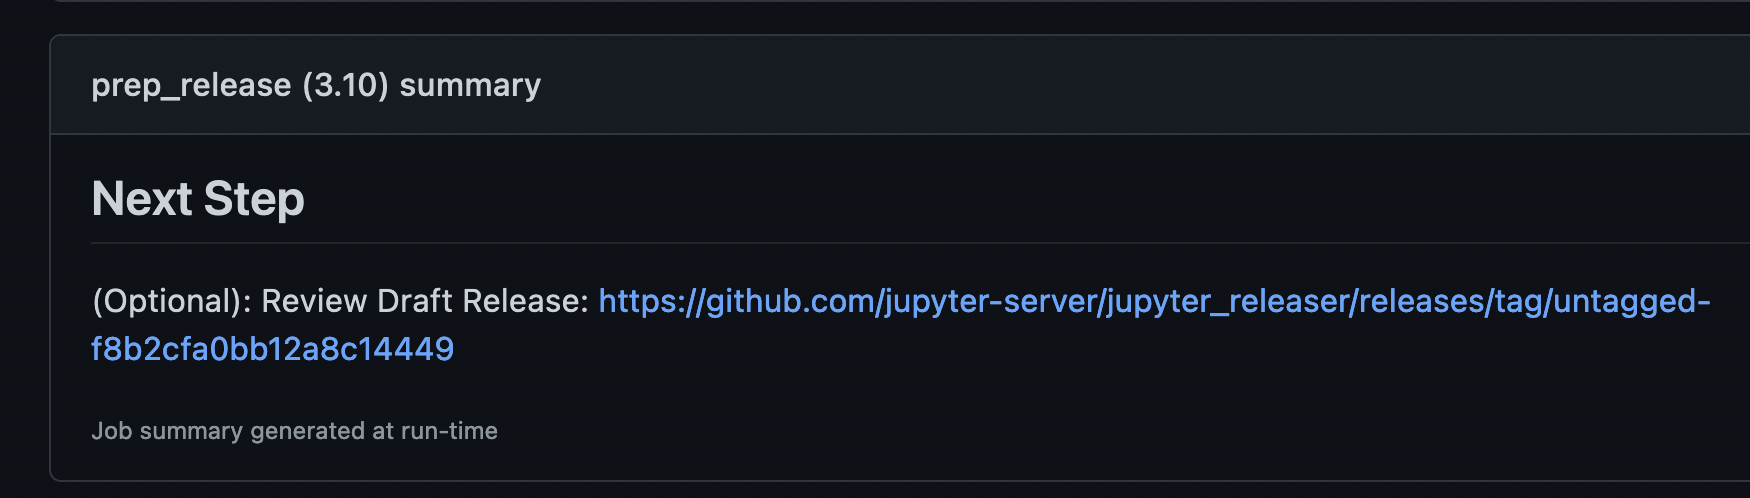
The workflow will finish the GitHub release and publish assets to the appropriate registries.
If the workflow is not targeting the default branch, it will also generate a forward-port pull request for the changelog entry to the default branch.
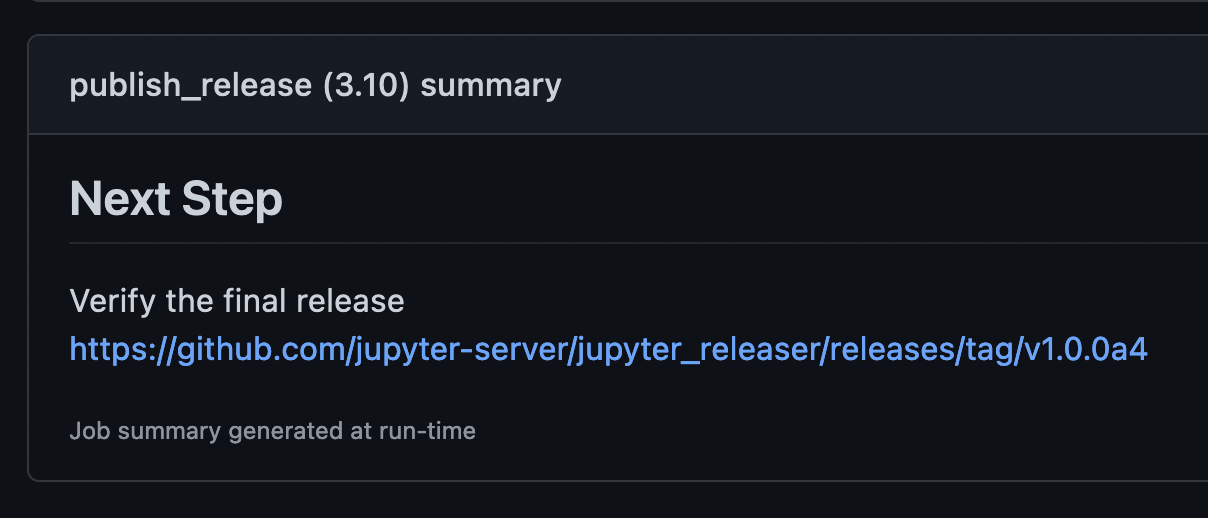
When the workflow finishes it will print a link to the GitHub release and the forward-port PR (if appropriate) in the “** Next Step **” output.
Note If the publish portion fails you can attempt to publish the draft GitHub release given by the URL in the “** Failure Message **” using the “Publish Release” workflow again. It will skip past the asset creation phase and move into asset publish.
Note GitHub Actions caches the secrets used on a given workflow run. So if you run into an auth issue, you’ll need to run a new workflow instead of re-running the existing workflow.
Review and merge the forward-port PR if applicable
Announce the release on appropriate channels